Monday, February 13, 2017

No More Unfinished Business!?!

Sometime ago,  I started to create a my first ever "Chunky Book"... I managed to make a few pages but eventually I ended up putting it on a shelf and pretty much forgetting about it, until now... I really do hate to leave anything unfinished, makes me feel like I've lost the battle between good & evil, for Supreme Creativity... so, I decided to jump back in and finish it once and for all, just like any super-powered Janoodle Warrior must do in these most uncertain of times!! 

Below are photos of my recently completed Janoodle Chucky... as usual, I do believe the pics do not do the work justice... (wishful thinking?? hope I'm not kidding myself!) Someday I will learn how to take a decent photo, but until then... oh well!! I was going to retake a few of them before I did the final post but I eventually remembered (whoops, another Senior moment) that it went postal today, it's on it's way to an unsuspecting soul at this very moment!!

Janoodle Chunky Book - front cover

Solar Explosion - page 1
Windy Wendy - page 2
           
 Nature Unfolds - 2 views of page 3


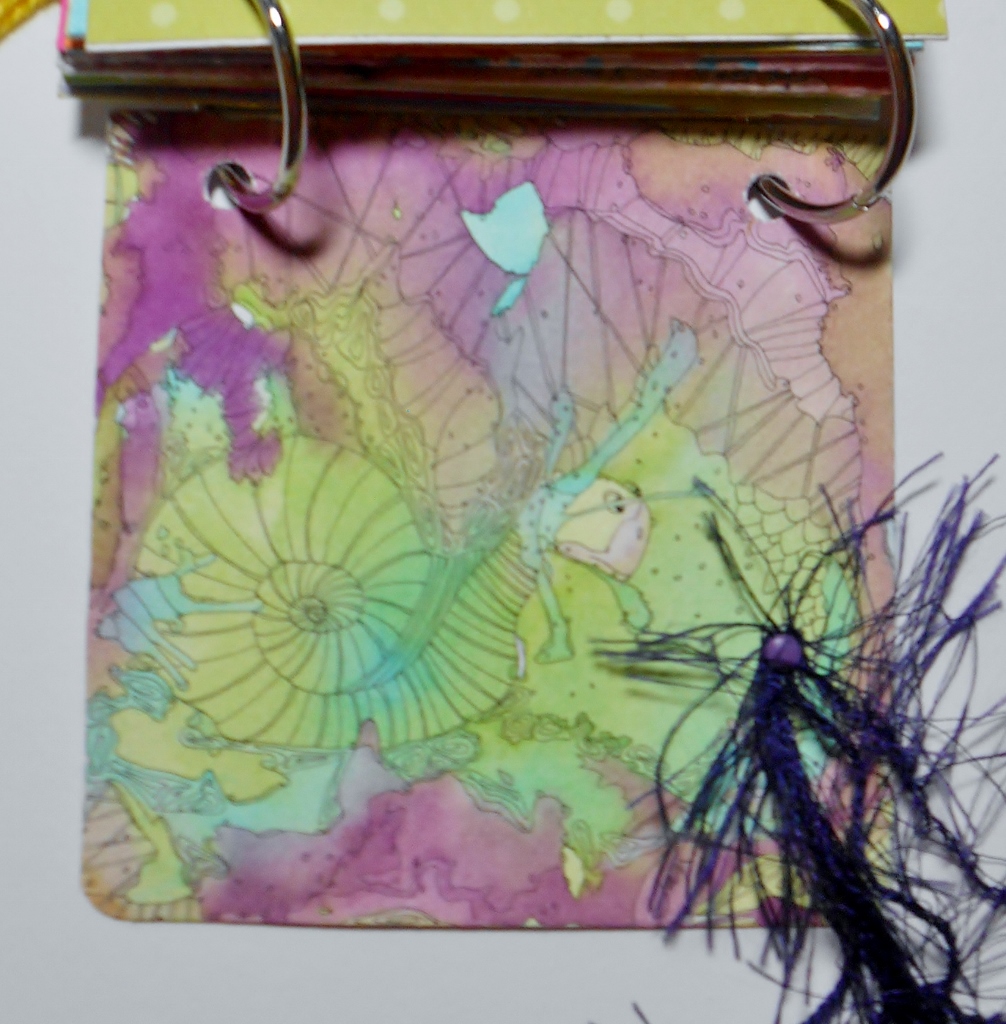
Snail's Pace - page 4

Magic Genie - page 5

Southern Belle - page 6

One That Got Away - page 7

Left Behind - page 8
 
Back Cover of Janoodle Chunky
My favorite thing about chunky books is that you can add pages anytime... the rings that hold it together can open & close at will... it does make a great gift because you can create & send additional pages to the recipient for any occasion... it's a gift that keeps on giving!!

  
Well, thanks for stopping by to take a peek...
Until next time, Blessings to One & All !!

Sunday, February 5, 2017

Fan Out and enjoy the ART around you!!

Today's Show & Tell has been inspired by a recent flashback of my childhood  (far more years ago than I will admit to)... here's a little back story, I will try to keep it as short as possible!

My mother and her older sister were only 1 year apart in age and as far back as I can remember they had an extreme sibling rivalry that lasted their entire life... each one reveled in trying to outdo the other in even the smallest of ways. I remember stories of them competing over who had the smallest waist, 19 or 19 1/4 inches (I do believe this was pre childbirth). They were well into their 70's when I overhead a phone conversation between the two of them, still trying to convince the other that they were the smaller!! In actuality they were very different women, if they would have just taken the time to realize that fact maybe they could have set aside all of the jealousy and enjoyed each other for who they were!! Bear with me, I'll get to the point soon...

I was the only girl in my family, all of the other "cousins" were boys... whenever we traveled back to visit our hometown, Aunt Lou made a point of taking time to spend with just me, her favorite niece. She always wanted to show me her latest jewelry, her very stylish wardrobe and new furnishings... even then I suspected it was more about me reporting back to my mother than it was about quality time with me! 

Finally, today's inspiration flashback... My aunt had a collection of hand painted "Fans" that I loved to look at but could never touch...  I can still see her as she would flip one of them open to fan herself while drinking cocktails in the evening... tres elegante!

I remember after seeing those lovely fans for the first time, I tried to make paper fans out of every picture that I colored. 

So, my journey into the past leads us here... "Janoodle Fans"


Let's get started... Take a look at this short & easy  "You Tube Tutorial"

  • 4 in. X 12 in. paper - weight suitable to score every 1/2 inch and hold up to creating your design with your medium of choice ... I used a lightly textured scrap booking card stock, it scored nicely and worked well with my Jacquard Dyes as long as I didn't overwork with too much water! My usual 140lb. watercolor paper was too heavy for getting a crisp fold.
  • REMEMBER... paint your design before scoring, then turn over to score on the back side
  • [12]   7 inch wooden coffee stir sticks -  natural or painted, your choice


Another brightly colored Janoodle design for my next fan


Fan Back - sticks are glued along every other fold


Finish off by gathering fan at folds... I held the fan in this folded position with an elastic cord while I attached the sticks together. I used a decorative string with beads, the video used a long brad for this step but I made smaller holes... I liked this much better... experiment a bit and you'll come up with what you like best!


 Thanks for hanging in through my childhood ramblings...
I hope this has inspired you to create your own hand painted fan 
or at the least to become a Fan of Fans!!

Until next time... HAPPY ARTing!!!  

Sunday, January 22, 2017

Big things do come in small packages!


Just a quickie "Show & Tell" on Domino Books today... I have previously posted Domino Books that I created for various swaps on ATC's For All so there's probably no need for an in depth explanation of what they are... but for those new to my blog, I'll make a long story short... they are completely addicting little books created by using Dominoes as the front & back "covers" with an accordion style insert of "pages" in the middle!

For this swap, I chose an "alphabet theme"... No, I have not reverted back to my childhood (or at least I don't think so)... For the artwork, I decided to contrast vibrant colored backgrounds [using Jacquard Dyes] with basic black & white designs on watercolor paper (except for the Cats, I did use a bit of color for "personality")... tissue paper was used to create the brightly colored  domino covers. For the first time, I chose to use an elastic cord to create a "belly band" closure in lieu of ribbons... (I must give a nod to a fellow artist on AFA, "LindyLu", for this wonderful idea... thanks for sharing!)

Below are photos of my finished Domino Books...

Alphabet Theme "Domino Books"


Front Cover Design Details
Inside design details
I hope I have managed to inspire you into tracking down those old games stored up in the closet and try your hand at making Domino Books... 

WARNING: This activity can become addicting!!

Thanks for stopping by, Until next time...
Blessings and Happy ARTing to All!!

Saturday, December 31, 2016

I've got "High Hopes" for 2017!


 Happy, Happy 
 New Year... 


 ( * OK everyone... lift your glasses, 
I'm ready to make my toast )

 "Blessings to 
you and yours 
for Good Health 
and Much Happiness
throughout 2017!!"


_________________________________________________________

New Year's Resolutions
  •  Don't forget to make ART a part of your everyday life!! 
  •  ART each day, keeps the doctor away!
  •  When in doubt "Keep on ARTing"!! 
____________________________________ 

Thanks for popping in... until next time, Ciao!! 


Friday, December 23, 2016

Happy Birthday Jesus!

 Hark the Herald Angels Sing...
Glory to the New Born King!!


Merry Christmas...
Blessings to one & all for a joyous season
filled with an abundance of love and wonder!!

Wednesday, December 14, 2016

Gift of ART... It's in the bag!!


When it comes to presents, the first thing anyone looks at is the wrapping... for me, it's an essential part of the gift giving experience and a perfect opportunity to get a little creative!! 

There are definitely an abundance of beautiful wrapping papers and gift bags available for purchase, all designed to guarantee a lovely presentation under anyone's Christmas tree!

Today's Show & Tell is meant to jump start your own creative juices with a fun and easy project that is equally easy on the pocketbook!!

I purchased some plain white and kraft paper gift bags at our local Dollar Store, depending on the size you choose, they come in bundles of 2 or 3 for $1.00. 


These bags are a perfect canvas for creating unique designs using your own favorite mediums.  In my examples, I have used a variety of supplies and methods... don't hold back, let yourself experiment a bit and above all else... have some fun!! 

Pictured below... 
  1. Polka Dots - acrylic paint applied with round sponges: Circles were made using "medication lids" as stamps on an ink pad 
  2. Original design hand-carved stamps (except letters) w/ ink pad


Pictured Below...
  1. Pine Needle Sprig imprint using acrylic paint w/ Micron details - hand carved stamp bow - bubble wrap Gelli print background
  2. Evergreen Sprig imprint using acrylic paint w/ Micron details - hand carved stamp bow - bubble wrap Gelli print background
  3. Christmas Trees - Hand carved stamps w/ acrylic paint - gold & white marker accents - rolled acrylic paint background


Original "Gift Bags" ready to pass out!

Thanks for stopping by... 

"A little ART each day keeps the Doctor away!! "

Until next time... Blessings to one & all!!

Sunday, December 4, 2016

Christmas Greetings straight from your heART!!


Making a list, checking it twice... for whatever the reasons, my Christmas Card list seems to be getting smaller & smaller each year... that realization does sadden me a bit... as long as my list still exists, no matter how many names are left, I will continue to be inspired to make my cards... Christmas just wouldn't be Christmas if I didn't!! 

Today's Show and Tell puts a "little twist" on a simple looking traditional card in the shape of a Christmas Tree... it fits into an ordinary business sized envelope... when opened, it becomes a free standing 3-sided Christmas Tree. Besides it's simplicity, each panel gives you ample room to showcase your talents and personalize in any way you choose... each one as unique as it's creator!!


My examples were created on 140lb. watercolor paper... of course, I'm sure you recognize my trademark "Janoodles" using Jacquard Dyes and Ink. I started out with 2 tree shapes that I decorated on only 1 side... Below, I have created a simple diagram that I hope can be easily followed...  (I'll explain the unfinished side more as we proceed)

Basic Tree Shape - make 2 for each card

*  Photos below represent each step


* Tree shapes glued together per instructions above

                            1                                   2                                 3

View 1 -  After gluing together, the 3rd side will give you a blank canvas  
to personalize your cards in any way you choose...
        Views 2 & 3 - I decided to Janoodle a similar design with a simple holiday greeting


Here is an example of a tree card created using a Gelli Plate and acrylic paint... no matter what your favorite medium may be, the variations you can achieve with this simple design will be endless... as always, the main objective is to have FUN!!


Thank you for stopping by!
Until next time...
Happy Holiday ARTing!! 

Friday, December 2, 2016

Let the Holiday Season begin!!

"Time flies when you're having fun!"... or so they say!! Realizing my lack of posts for the past few months, let's just assume they are right and I've just been having way too much fun (a little fantasy can't hurt)... anyway, I still can't believe that it's already December and 2017 is just around the corner!!

Ready or not, the Holiday Season is upon us... let's get back in the swing of things with a little Show & Tell to kick it all off!

I love gourds of all shapes and sizes, they are a perfect natural form & canvas for creating unique works of art... for our purposes today, I chose the smallest variety available... Tennessee Spinners. These wonderful little gourds can be used to create very imaginative Christmas Ornaments with very few supplies needed! My favorite medium to use is black archival ink... I love the contrast of the design with the natural color of the gourd. Many artists use acrylic paint to achieve their desired results while others use wood burning tools... experiment with your favorite supplies and most important, remember to have fun!!    

Pictured below: Tennessee Spinners - small bottle shaped gourds - average size is about 2 inches tall and approximately 1 1/2 inches in diameter (give or take a smidge) - I have a local farmgal that grows mine but I have seen them for sale on ebay, just make sure they are "cleaned" and ready to use... (trust me, you don't want to deal with the moldy, crusty layers from the drying process)

Tennessee Spinners - natural color

Pictured below are a few non-holiday specific ornaments to hang year 'round but also look great on a Christmas tree... the only medium used is black archival ink, using the natural color of the gourd for contrast... they are finished by spraying a few coats of clear gloss acrylic. (Note: the wire is attached by drilling a tiny hole across the neck of the spinner)


Pictured below are classic designed Christmas "Snowman" Ornaments... acrylic paint in a variety of bright colors with fuzzy pipe cleaners, ribbon, craft wire & bell accents... they're sure to put anyone into the Holiday Spirit!!

Move over Frosty... Gourdy the Snowman is in town!!

Thank you for stopping by... 
I'm planning to get back to my usual routine with more 
Holiday projects to share... Please check back!
Until next time... Blessings to you all !!

Sunday, August 28, 2016

Cotton Candy and a slice of "Humble Pie"!

End of Summer means "Fair Time" in Northeast Washington... I usually try to be supportive & join in whenever there are community events, especially if ART is the focus... I have been in charge of the judging for the Kids Fine Arts Exhibit for several years. I was part of the Adult Judging for a few years before switching over to the Kid's Art, of course at that time I was not eligible to enter any work myself. After the switch I really didn't give it a serious thought since one of my closest friends & biggest ART supporters served as the judge, there was no doubt in my mind that she would recognize my work.  This year, I went ahead as a surprise to her and confidently entered a piece that she had never seen... in the end, it turned out the surprise was on me!  

Let me be perfectly candid... I must confess, my "artist" ego did get the best of me! I had entered my piece in the "Senior" division, knowing fully that she always judges in full support of everyone's efforts to encourage their participation... I was confident that a Blue Ribbon was inevitable!! When our various judging duties were over for the day, I met up with her and she never commented on her surprise at seeing my entry. I thought she must be playing along and making me wait until the next day when the fair opened to see for myself... but patience is not my strongest virtue, I asked her if she enjoyed my surprise but she simply gave me a blank look... she didn't even recognize my work (the names aren't shown until after the judging)... that, in itself, was hard for me to believe... I described the piece and after a moment her face changed to a look of recognition, "did it have a blob of pink in the center?"...   I instantly knew things didn't go as I had planned!! In the end, I'm not sure which one of us regretted my surprise entry the most... I definitely wished that I hadn't put my friend in a position that made her now feel so badly!! 

The next day I joined all of the other fair goers on opening day to see the exhibits... making my way to the "ART Barn", I immediately noticed my entry with its bright Red Ribbon and quickly read the judge's comments... it took me a moment to put my ego in check, but I soon felt very proud of my friend... I agree wholeheartedly with her critique of my work, it took her objective eye for me to actually see beyond my own self-centered view!  (Of course, I can't let her know, I have to milk "my bruised ego" a little bit longer, just for fun!!)

Pictured below: My "Red Ribbon" fair entry. 11X14, Jacquard Dyes w/ink 

"Dancing Under the Sea"


 Thanks for stopping by, Until next time...
Blessings to One and All!!


Thursday, August 11, 2016

Light as a feather artwork suitable for hanging!

Just a quicky Show & Tell for today... As I've mentioned in previous posts, for several years I have volunteered each summer at our local Historical Center. Every season we hold an annual art exhibit and marketing contest with a theme that is relevant to our local Native American culture, this year the theme was "feathers". The winning artwork is used as a marketing tool for our next season's advertising & merchandising. I always participate, just for the fun of it... as a board member, I am exempt from the competition & prize money.

Below is a photo of my interpretation of the theme (the components are mounted to provide some dimension to the piece)... the piece is 11X14 and framed to 16X20... I call it, "Medicine Fans"

"Medicine Fans"

Well, thanks for popping in...
Until next time, Happy ARTing!

Sunday, July 31, 2016

When in doubt, reach for your favorites!!

What do you do on a hot summers day? I, for one, do not do well in the heat (triple digits all week) so an indoors activity (aka: ART ) is my first choice!! When in doubt, I pull out the "old tried & true"... Jacquard Dyes are my "go to" medium of choice... I love the vibrant colors, the way they flow & saturate the paper leaving behind a welcoming surface for my favorite pen... I never tire of working with them!    

I really enjoy making postcards, the size seems just right... not too small & not too big... the plus being, when you're finished you can slap a postage stamp on it and share a bit of yourself along the way by sending a little greeting to someone that you've been thinking of! 

Pictured below are some postie "blanks" waiting to be Janoodled... 
 

Pictured below are the finished postcards awaiting their postal journeys... I originally planned to write different versus on each, but for some reason I felt what I had to say could just bear repeating... 

My "ART" is not what I do, it's who I am!


 I'm very glad you stopped by to see what's new... 
Until next time,  Happy ARTing!!

Sunday, July 24, 2016

One brushstroke at a time!

Good news everyone... I am not going to "beat the dead horse" with any more excuses of an absentee muse in my world... It's time to move on!!  

 Below you will find a few recent projects... just for fun!!

First of all... 
 Happy Summertime to All...  
Hope you are enjoying fun filled adventures that are sure to make many wonderful memories?!


"Starry Nite" Janoodle Envie - Shimmer background doesn't show up

 Janoodle "Puzzle" -  created for an AFA Swap   
 
"Living Canvas" - clumsy me, I dropped a bottle of dye

As usual, thanks for stopping by...
Blessings to you all!!