Remember when you were a kid (it's definitely a farther stretch for some of us!), when February rolled around, our teachers used Valentine's Day as an excuse to have an art project!? I can't begin to count the number of hearts that I must have made, in retrospect it felt like a gazillion or more!! I fondly remember my most favorite project of all... My Valentine Mailbox! (aka: Shoebox) I loved covering & decorating it, making it my very own original and unique vessel with high hopes of it becoming filled to the brim on Valentine's Day. Long after the big day had passed, I would go through my saved treasures and admire everyone's creations... even back then, I was an Art Hoarder, a habit that I would continue throughout my life!! Yes, my name is Jan and I'm an Art Addict!! (and proud of it!!)
Well, enough of my walking down memory lane, it's time for Show & Tell!!
Poking around the internet, I came across a couple of pics that inspired this project. I tend to take a little bit here and a little bit there and add it to a little bit more until I've been inspired to make a prototype of my grand plan... Voila, a project is born!! With Valentine's Day approaching, I thought this would be a great project to share! Hopefully, you will be inspired to give it a try & see how you can put your own creative stamp on it!!
So, let's get started with our Accordion Flag Card... 2 1/2" X 3 1/2" (ATC size)
Below: It may seem like I'm working backwards & you are right, I am... photos of the finished work.
 |
| View showing the accordion spine of the card |
 |
| View of standing card ( closed ) |
 |
| View of untied card from the top - stands on it's own - *notice the flag positions |
 |
| View of opened card - the top flags on the accordion point to the right & the bottom flags to the left |
So, here's how I got started...
Below: Begin with a strip of any color card stock 3 1/2" X 8" - to create the accordion spine, mark the 8" sides every 1/2" - using a ruler and a scoring tool, draw a score line connecting from top to bottom - there should be 15 scored lines when finished - fold in alternating directions at the score lines to create an accordion .
.jpg) |
| Needed supplies - card stock, ruler & scoring tool |
 |
| Finished accordion should have 7 peaks with a single flap at each end |
The next step is to create the Flags... I used watercolor paper, but you can use any paper of your choice. You will need to cut 14 flags - 1 1/2" X 2 1/4" - I used my old faithful, Jacquard Dyes, to create my background designs and finished with details using pen & ink. This is where you can make them your own by using any medium & technique that you enjoy working with! When making your designs, take note that 7 flags will be pointing to the right & 7 flags will be pointing to the left. You may want to lay out your designs accordingly. I trimmed the edges that are not attached to the spine, as well as using a hole punch in some places. In doing this, I think it adds another design element to the overall work.
 |
| Jacquard Dye backgrounds before ink detailing |
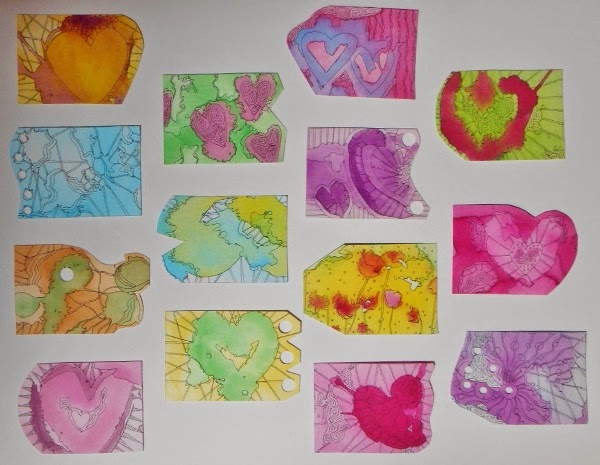 |
| Finished flags - ready to attach to the accordion spine |
The only thing left to do, is to assemble your cards... my first step was to attach my front and back covers - on the inside, I used one of my ATC sized Janoodles on each side attached to the end flap strips. On the outside, I used a plain red card stock. All assembling was done with two-sided tape. For placement, refer to the photo below.
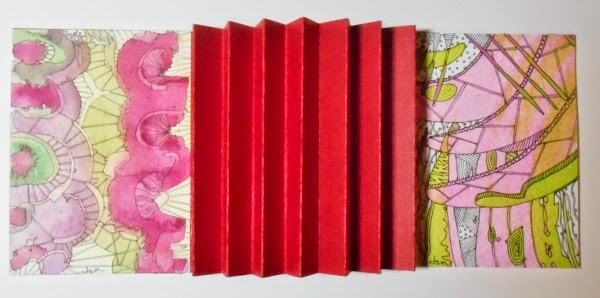 |
| Inside covers are attached to spine at both ends with the 7 peaks in the center |
You are now ready to attach the flags to the peaks. I am using the photo below to easily show you their placement. Start on the right side of your card - on the 1st peak you will attach 1 flag to the top half of the right side of that peak - on the left side of the same peak, attach another flag to the bottom half of the strip. Important, do not let the flags touch, leave a small gap between so that they will point in opposite directions and freely move when opening & closing your card. Repeat these steps with each peak using all 14 flags. Refer to the previous photos at the beginning of this post to once again see the finished work!!
 |
| Example of flag placement to the accordion peaks |
Hopefully I didn't confuse you too badly! Sometimes, doing is a lot easier than explaining... when in doubt, just jump in and I believe that you'll figure it out in the end!! As always, the most important thing is... Have FUN!!
Thanks for stopping by... Until next time,
Blessings to one and all!!
This is crazy good! Thanks for the tut... It's on my art bucket list!
ReplyDelete